When you click the Create Calculator button, you’ll be taken to the first step: choosing a calculator type.
Step 1: Choose a Calculator Type
Filtering and Searching
Filter by category – Use the category menu to display only calculators from a specific category.
View all calculators – Select All to see every calculator type in a single list.
Search field – Use the search bar in the upper right corner to quickly find a calculator by name.
You’ll see five main categories, each with specific calculators you can start with. Choose the category and calculator type that best matches what you’d like to build:
Fitness, Movement & Weight Loss
BMI Calculator
Body Fat Calculator
Muscle Mass Calculator
Protein Calculator for Weight Goal
Health Risk & Prevention
Diabetes Risk Calculator
Osteoporosis Risk Calculator
General Health Calculator
Meno Symptom Calculator
Mental & Physical Wellness
Stress Calculator
Sleep Quality Calculator
Chronic Fatigue Syndrome Calculator
Personal Life Burnout Calculator
Work Life Burnout Calculator
Nutrition Assessment
Calorie Calculator
Macronutrient Calculator
Dietary Risk Calculator
Gut Microbiome Calculator
Hydration Calculator
Specialized Health Assessments
Hormone Balance Calculator
Step 2: Choose a Layout
After selecting a calculator type, the next step is to decide how your calculator will appear on your website. Choose the layout that best fits how you want your visitors to interact with the calculator.
You can choose from three layout options:
Popup Modal – The calculator opens in a popup window when triggered by a visitor.
Inline Model – The calculator is embedded directly on the page as part of your website content.
Slider – The calculator appears in a panel that slides out from the left or right side of the page.
Step 3: Customize the Design
In this step, you’ll customize the look and feel of your calculator. The design settings give you flexibility to match the calculator’s appearance with your brand and website. You can adjust:
Popup settings – Control the overall appearance such as fonts, colors, and background.
Header settings – Add images in your calculator's header, adjust the header fonts, or disable the header entirely.
Footer – Choose to hide LeadCalculator's logo or display a disclaimer text at the footer section of your calculator.
Label text – Style the labels for your form fields.
Input fields – Adjust how the input fields look.
Buttons – Customize the design of your calculator buttons.
In addition, the design page includes:

Name field Give your calculator a unique name for easier management.

Preview button – See how the calculator will look before publishing.

Save button – Save your progress at any time.

Publish button – Publish your finished calculator to make it live.
Step 4: Set Up the Capture Form

The capture form collects information from people who use your calculator. By default, the form includes fields for name, email address, and phone number.
You can customize the form to fit your needs:
Enable terms – Add custom terms text that users must agree to before submitting.
Required fields – Choose whether name, email, or phone number must be filled out.
Additional fields – Add more fields, such as extra text fields, name fields, phone number, or email fields
Step 5: Customize the Thank You Page

After a visitor submits the form, they’ll be directed to a thank you page. You have two options for what happens next:
Redirect to a URL – Send the visitor to a specific page of your choice.
Customize the thank you page – Create your own thank you page by adding:
Video
Image
Thank you text
Call-to-action button – Direct visitors to another page when they click the button.
Step 6: Customize the Email Templates
Once a visitor submits the form, an email is automatically sent to them. Each calculator type comes with its own set of email templates, which you can customize to fit your needs.
Each score range of each calculator has its own default email message. You can edit the email copies for each score range:
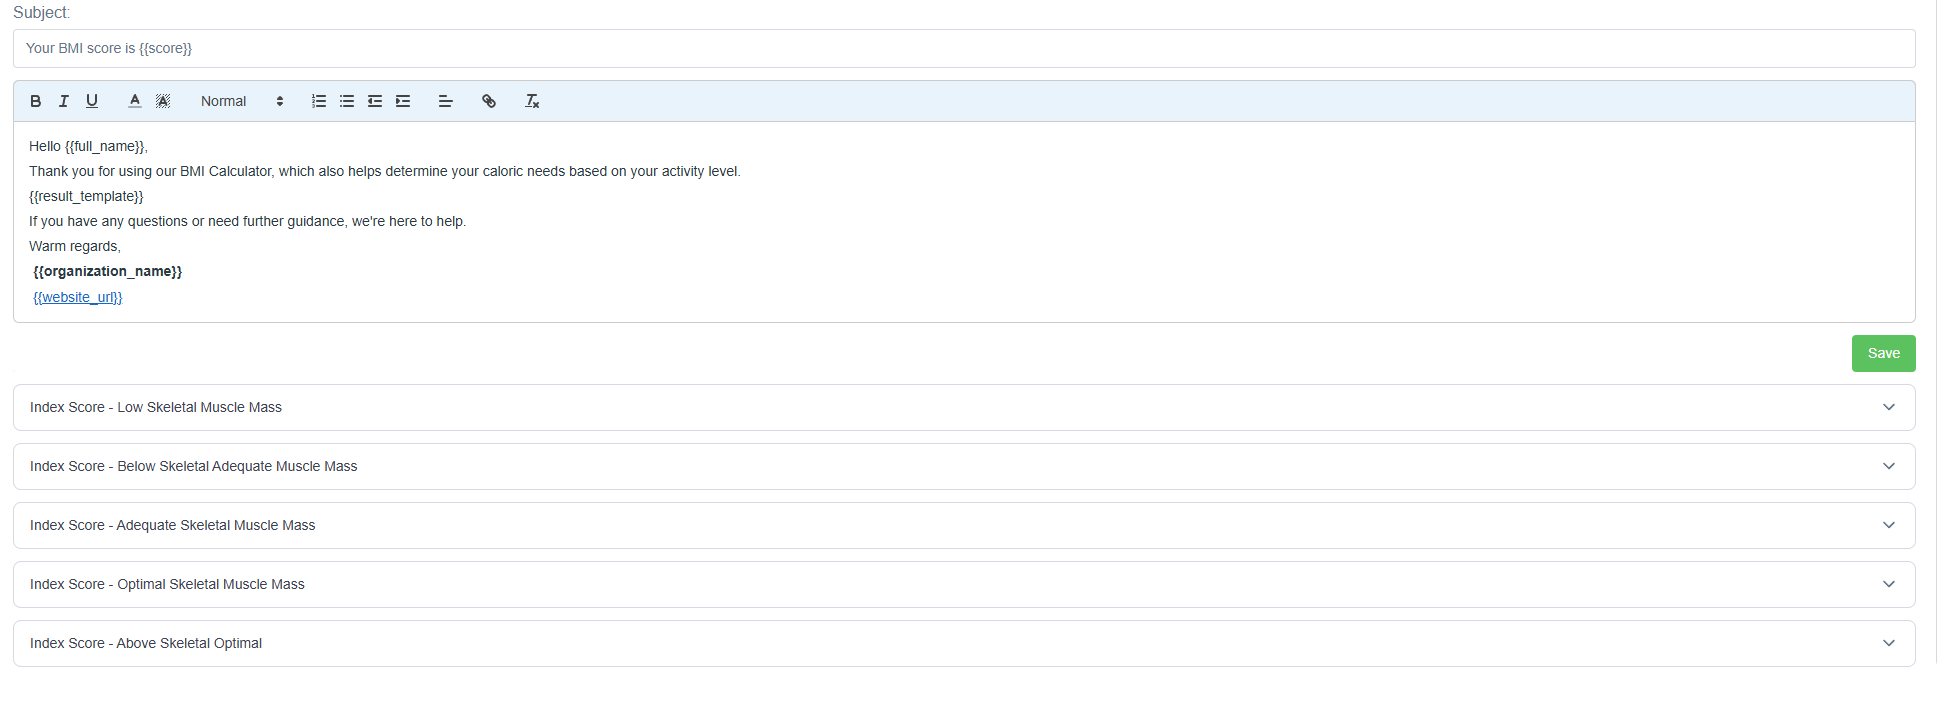
In this step, you can:
Set the subject line of the email.
Edit the body text and personalize it with liquid variables.
You can use the following liquid variables in your template:
{{full_name}}– Full name of the lead{{email}}– Email address of the lead{{score}}– Final result computed by your calculator{{organization_name}}– Your business name{{website_url}}– URL of your website
Step 7: Embed the Calculator
After creating and customizing your calculator, the final step is to embed it on your website so visitors can use it.
Add the head/footer script – Add the provided script once into your website’s
<head>or<footer>section.
Place the calculator on a page – Depending on the layout you selected:
Popup Modal or Slider – Add the provided script to the page where you want the calculator to appear.
Inline – Insert the HTML line into the page content where the calculator should be displayed.
Check your layout – The calculator will appear on your site according to the layout you chose during setup.
Once embedded, your calculator can be saved and/or publish it to make it live!
Was this article helpful?
That’s Great!
Thank you for your feedback
Sorry! We couldn't be helpful
Thank you for your feedback
Feedback sent
We appreciate your effort and will try to fix the article